Sunday, October 23, 2011

Installing the MeeGo OS onto Your Computer, Using a Windows App [ MeeGo Guide]

0 comments
 

Windows Instructions


If your computer does not have the MeeGo OS installed and you want to replace an existing Windows operating system with the MeeGo OS, follow the instructions on this page.
Notes:
  • There may be image writer tools for other operating systems available, as well.
  • If you are a Linux developer, you may prefer to use these instructions for Linux.

Getting Ready

System Requirements
  • CPU: Intel Atom or Intel Core 2 CPU (support for SSSE3)
    Note: MeeGo will not work on non-SSSE3 CPUs
  • Platforms with the GMA-500, Nvidia, or ATI Graphics chipset are not supported.
  • Tested netbook and nettop platforms
Follow the Processes on This Page Completely and in Order
To make the overall procedure of downloading and installing the image easier to follow, the procedure is broken down into smaller processes, but you must perform all of the processes below completely and in the order they are presented to replace your computer’s current OS with the MeeGo OS.
Notes:
  • When you install MeeGo OS, all programs and any other content that exists on the computer you are installing onto will be permanently deleted.
  • Before you installing the MeeGo OS on your computer, make sure you test it. Testing instructions are provided below in process D, Testing the MeeGo OS Image on Your Computer Before You Install It.
    Note: Testing does not work on some computers, such as Sony netbooks.
  • The computer you are installing the MeeGo OS onto must have a USB port.
  • You will need to use a computer to download the image file and save it to a USB drive, even if the device you will be installing the MeeGo OS on is not a computer.

A. Download the Image Writer for Windows Tool

Image Writer for Windows is a Windows program that saves and restores images from removable drives, such as a USB drive, which is what you’ll need to install the MeeGo OS. You can use Image Writer for Windows to write a boot image to a USB drive, which you’ll be able to use to install the MeeGo OS onto your computer or device.
  1. Open the website for the Image Writer tool for Windows.
    (Ubuntu version)
  2. On the right side of the Image Writer for Windows website is a Downloads area. On the right of the top green button, that reads “win32diskim...3-win32.zip”, click the down arrow.
    Win32 Disk Imager download screen
  3. If you have WinZip installed, select open with WinZip.
    Note: If you do not have WinZip installed, you will need to install the WinZip program first and then return to step 1 of these instructions.
  4. In Windows Explorer, create a folder on your computer where you will extract the WinZip file.
  5. Once the WinZip file opens on your computer, select all of the files in the WinZip folder, click Extract, and then browse to select the folder you created to extract the files into.
  6. If that folder doesn’t open automatically, navigate to it in Windows Explorer and double-click on the Win32DiskImager.exe file. The Win32 Disk Imager program opens.
    Win32 Disk Imager screen

B. Download the MeeGo Image File for Your Device

  1. In a browser window, open the MeeGo Downloads page.
  2. Click the Download link to the left of the device type (such as netbook) you want to download the MeeGo OS for.
  3. In the screen that appears, select Save File, and click OK.
  4. Once the download is complete, right-click the file’s name in the Downloads screen and select Open Containing Folder.
  5. In the Download Complete screen, click Close.

C. Save the MeeGo Image File onto a USB Drive

  1. In the Win32 Disk Imager window, click the folder button to the right of the Image File Field.
    Win32 Disk Imager screen, folder button selected
  2. In the Select a disk image screen browse to select the image file you just saved (browse to the same folder that opened when you clicked Open Containing Folder above in step 4 of process B, just above this process) and click Save.
  3. The name of the file you selected appears in the Image File filed of the Win32 Disk Imager window.
    Win32 Disk Imager screen with Image File name
    Note: The name of the image file you saved may be different from the example Image File name in the screen above.
  4. Insert an empty USB drive into a USB port on your computer. The Device field should fill in automatically to reflect the USB drive’s location.
    Note: If the Device field does not fill in automatically, click the refresh button to the right of the Device field and you will see the available drives listed. Select the correct one for your USB drive.
    Win32 Disk Imager screen, refresh button selected
  5. Click the Write button to save the selected image file onto the USB drive.
  6. In the Confirm overwrite screen, click Yes.
    Confirm overwrite screen, Yes button selected
  7. The image file will begin saving to the USB drive. This may take several minutes.
    Win32 Disk Imager screen, file saving
  8. Once the progress bar reaches 100%, file is saved, and then the progress bar disappears completely. Now you can remove the USB drive from your computer.
    Win32 Disk Imager screen, progress bar past 100%

D. Testing the MeeGo OS Image on Your Computer Before You Install It

Before you install the MeeGo OS on your computer, deleting all existing content on that computer, you should test to make sure MeeGo will work on that computer.
Note: Testing does not work on some computers, such as Sony netbooks.
  1. Turn off the computer or device on which you are going to install the MeeGo OS.
  2. Insert the USB drive into a USB port on that computer or device.
  3. Turn the computer or device on.
  4. As soon as you turn on that computer or device, rapidly and repeatedly press the key on your computer's keyboard that allows you to access the “Boot Menu”, a screen that lets you select, using your up and down arrow keys on the computer’s keyboard, which drive you want to boot your computer from.
    Note: The key that allows you to access the boot menu varies by computer. For some it's the F12 key, for others it's Esc, 0, F9, or possibly something else. If none of those work, refer to your computer's documentation.
  5. Use your down arrow to select USB and press Enter on your keyboard.
  6. In the Welcome to MeeGo! screen, use the down arrow to select Boot MeeGo and press Enter on your keyboard.
  7. If the MeeGo Myzone screen appears, MeeGo will work on your system.
    Note: If you remove the USB drive from your computer, MeeGo will not continue working properly until you reinsert the USB drive.

E. Installing the MeeGo OS Image onto Your Computer

  1. Turn off the computer or device on which you are going to install the MeeGo OS.
  2. Insert the USB drive into a USB port on that computer or device.
  3. Turn the computer or device on.
  4. As soon as you turn on that computer or device, rapidly and repeatedly press the key on your computer's keyboard that allows you to access the “Boot Menu”, a screen that lets you select, using your up and down arrow keys on the computer’s keyboard, which drive you want to boot your computer from.
    Note: The key that allows you to access the boot menu varies by computer. For some it's the F12 key, for others it's Esc, 0, F9, or possibly something else. If none of those work, refer to your computer's documentation.
  5. Use your down arrow to select USB and press Enter on your keyboard.
  6. In the Welcome to MeeGo! screen, use the down arrow to select Installation Only and press Enter on your keyboard.
  7. In the first screen of the installation wizard, click Next.
  8. In the second screen, select the language you want to set as your computer’s language default, then click Next.
  9. In the following screen, in the drop-down field at the top of the screen, select Remove all partitions on selected drives and create default layout. Then click Next.
  10. In the Writing storage configuration to disk screen, click Write changes to disk. Wait for several minutes while the MeeGo OS installs.
  11. In the final screen of the installation wizard, which reads “Congratulations, the installation is complete.” at the top of the screen, click the Close button.
    Note: Do NOT remove the USB drive until the computer’s screen goes black, then remove it immediately.

F. Completing Your MeeGo OS Setup

  1. The computer should restart automatically. If it doesn’t, wait a few moments and then press the power button.
  2. After a minute or two, the MeeGo background screen will appear, then disappear and there will be a black screen for a few moments before the MeeGo Setup screen appears. Click Forward.
  3. In the Keyboard screen, select the language you want to use for the computer’s keyboard. Click Forward.
  4. In the Time Zone screen, select a city that is within your time zone. Click Forward.
  5. In the Date and Time screen, set the correct date, hour, minute, and second. Click Forward.
  6. In the Backtrace Collection screen, select Yes if you wish to automatically report computer crashes to the MeeGo reporting database, and No if you do not wish to report your computer’s crashes. Click Forward.
  7. Enter a username, your full name, and then a password you wish to use, which you repeat in the Confirm Password field. Click Finish.
  8. Wait a few minutes and MeeGo will launch and be ready for you to use.
    Note: For help using MeeGo, take a look at the MeeGo help file.
Readmore...

How Do I Install MeeGo? [MeeGo Netbook FAQ and Guide]

0 comments
 
For users
We have some instructions for Windows users that contain detailed instructions for putting the MeeGo image onto a USB drive and installing it on your netbook. Keep in mind that you will need to carefully follow these instructions to burn the image (you can't just drag and drop it) onto a USB drive.
For developers
We have pages with installation instructions for Mac / Linux and complete instructions for building images.

Installing the MeeGo OS onto Your Computer, Using a Windows App

Installing MeeGo on your Netbook Linux and Mac Instruction


Readmore...
Saturday, October 22, 2011

Will MeeGo Work on My Netbook? [ MeeGo Netbook FAQ ]

0 comments
 
MeeGo Download

MeeGo 1.0 currently requires:
  • CPU: 32 bit Intel Atom or Intel Core 2 CPU (support for SSSE3)
    • Note: MeeGo will not work on non-SSSE3 CPUs
  • A compatible Intel graphics chipset. GMA-500, Nvidia, and ATI chipsets are not supported. See User:Vgrade for GMA500 instructions.
Note: Additional hardware configurations will be supported in updates / future revisions. See below for an explanation of why MeeGo doesn't run on your hardware.
We have a list of netbooks that are officially supported and that other users have been testing.
We recommend that you fully test MeeGo without disrupting your existing operating system by running it directly off of a thumb as described in the install guide.
Note: You may still find that some wireless cards or other components in your netbook are not be supported in this 1.0 release. Please report any issues in the netbook section of the forum, and we'll try to get them fixed as soon as possible.
Readmore...
Friday, October 21, 2011

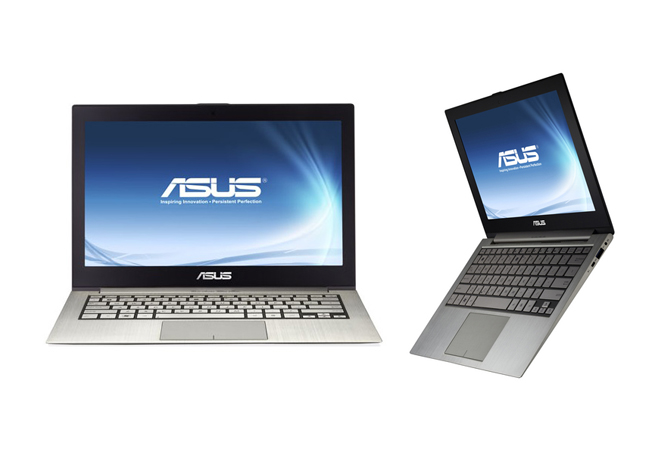
Asus Zenbook UX31 13.3-inch Core i7-2677 64bit Windows 7 Laptop Review

0 comments
 
ASUS has just been released their new laptop  Zenbook UX31. Intel Core i7-2677 64Bit Processor, Windows 7 OS, 13.3-inch display with higher 1600×900 resolution. Long time battery life gives you the experience of non breaking computing.  This product is same as UX21 Zenbook. Only difference is that UX21 has 11.6 inch display and all are same....


Specifications

UX31E-DH52 & UX31E-4DH53: Intel Core i5-2557 processor
UX31E-DH72: Intel Core i7-2677 processor
13.3-inch 1600×900 resolution screen
4GB RAM
128GB / 256GB SATA III SSD
0.3-megapixel webcam
Bang & and Olfusen ICEpower and ASUS SonicMaster Technology HD Audio
1x USB 2.0 / 1x USB 3.0
mini HDMI / mini VGA ports
SD card slot
50Whrs battery (7 hrs) and 10 day standby
Genuine Windows 7 Home Premium 64bit
Readmore...
Saturday, September 24, 2011

Microsoft Windows 8 (32-bit and 64-bit) OS Free Download For Developer Preview

5 comments
 
Microsoft Windows 8 Operating System has been released for free in both 32-bit and 64-bit version for developer preview. You could try it for free to ensure about the features of this new Windows operating system. In this article you will get the direct download link of new Windows 8. Microsoft will release download link for the developer preview version announced it by Microsoft after the BUILD conference and giving away of free Windows 8. Now this link is open to all for free. You have not to give the activation key......

Microsoft windows 8


Must Read: Microsoft Windows 7 Home Premium

Video:Windows 8 Concept


Windows 8 Developer Preview


Windows Developer Preview with developer tools English, 64-bit (x64)

DOWNLOAD (4.8 GB)
Sha 1 hash – 6FE9352FB59F6D0789AF35D1001BD4E4E81E42AF
All of the following come on a disk image file (.iso). See below for installation instructions.
  • 64-bit Windows Developer Preview
  • Windows SDK for Metro style apps
  • Microsoft Visual Studio 11 Express for Windows Developer Preview
  • Microsoft Expression Blend 5 Developer Preview
  • 28 Metro style apps including the BUILD Conference app

Windows Developer Preview English, 64-bit (x64)

DOWNLOAD (3.6 GB)
Sha 1 hash – 79DBF235FD49F5C1C8F8C04E24BDE6E1D04DA1E9
Includes a disk image file (.iso) to install the Windows Developer Preview and Metro style apps on a 64-bit PC.

Windows Developer Preview English, 32-bit (x86)

DOWNLOAD (2.8 GB)
Sha 1 hash – 4E0698BBABE01ED27582C9FC16AD21C4422913CC
Includes a disk image file (.iso) to install the Windows Developer Preview and Metro style apps on a 32-bit PC.

System Requirements

Windows Developer Preview works great on the same hardware that powers Windows Vista and Windows 7:
  • 1 gigahertz (GHz) or faster 32-bit (x86) or 64-bit (x64) processor
  • 1 gigabyte (GB) RAM (32-bit) or 2 GB RAM (64-bit)
  • 16 GB available hard disk space (32-bit) or 20 GB (64-bit)
  • DirectX 9 graphics device with WDDM 1.0 or higher driver
  • Taking advantage of touch input requires a screen that supports multi-touch

How to install the Windows Developer Preview from an ISO image

The Windows Developer Preview is delivered as an .iso image that must be converted into installation media stored on a DVD or a USB flash drive. On Windows 7, the easiest way to convert this file is to use Windows Disc Image Burner. On Windows XP and Windows Vista, a third-party program is required to convert an .iso file into installable media—and DVD burning software often includes this capability.
Note: The .iso file that contains the developer tools requires a large capacity DVD called a DVD-9, as well as a DVD burner that can handle dual-layer (DL) DVDs. Most modern burners should be able to handle this format.

Before you Go ahead installing it you should know few stuff

1. This preview version will work fine for 1 year, it seems.
2. You will need a large 8.7GB capacity DVD(called DVD9) for burning Windows Developer Preview with developer tools English, 64-bit
3. This version only have Internet Explorer 10, Metro-style UI, upgraded Task manager, but missing most other program. But it is expected.
4. This version comes with all 25+ desktop apps that have been shown in BUILT conference.
So, do you want to give it a try? Share your experience with us.

Visitors Query:

windows 8 developer cd/dvd device driver
windows 8 developer preview download
windows 8 iphone driver help
metro apps missing from 32-bit
preview-for-free.xhtml
Microsoft Windows 8 Developer Preview
iphone 4 driver windows 8
pogramme herunterladen win8
WINDOWS DEVELOPER PREVIEW ACTIVATION
windows 8 developer dvd device driver missing
How to unlock features on windows developer preview
Windows 8 x64 cd/dvd missing
install Windows 8 Developer
windows 8 developer preview x64 missing drivers
windows8 developer treiber cd
a required driver is missing windows 8 developer preview connect
Microsoft Windows Developer Preview x86-x64 Full 3 in 1 DVD-9
dl windows 8 developer
windows 8 developer preview "device driver"
windows 8 developer missing driver
microsoft windows 8 preview
windows 8 developer preview build
windows phone support tool 4.8 installer
Windows DeveloperPreview-64bit-English.iso
windows developers preview
free download Activation windows8 32 bit
windows 8 developers builds
windows 8 tablet pc
windows8 tablet
Windows 8 Developer+missing driver
win8 Developer
unlock features windows developer preview
Windows 8 DeveloperPreview-32bit-English
Windows Developer Preview ask activation
apps missing in 32 bit windows 8
windows 8 driver missing
windows 8 developer preview device driver missing error
Windows 8 Developer Preview Builds
unlock games windows 8 preview
windows8 developer preview dvd driver missing
windows 8 free download
free download activation for windows developer preview
win 8 developer preview
baixar windows 8 64 bits
ISO images of the Windows 8 developer preview
Windows 8 Developer Preview
windows 8 developer preview missing driver help
windows 8 developer preview DVD ROM missing
ie 10 metro style 32 bit
Includes a disk image file (.iso) to install the Windows Developer Preview and Metro style apps on a 64-bit PC
how to get 28 metro style apps for x86
windows 8 developer preview install cd device driver missing
Is IE in Windows 8 Preview x64 64 bit
how to install windows developer preview tools
windows 7 usb download tool 8 developer preview not work
windows 8 developer preview 64 burning to dvd
DOWN LOAD AND INSTALL WINDOWS 8 FOR FREE
themes for windows xp free download full version windows 8
Readmore...
Tuesday, September 20, 2011

LG 32LV2500 32-Inch HDTV With Slim 720p 60 Hz LED Display Review

0 comments
 
Who does not want to enjoy better, clean, more dazzling awesome picture? Your choice may be different. But your eyes  will must be still if you see the new LG 32LV250 LED HDTV. Beautiful and  Slim design with stunning HD technology will make you happy. Here I will discuss detail about LG 32LV250 Display. This is an Amazon’s product review. You can read the original review here. Or Checkout more details bellow. ..
LG 32LV2500 32-Inch 720p 60 Hz LED HDTV


LG 32LV2500 32-Inch HDTV With Slim  720p 60 Hz  LED Display Review


Product Features

  • LED Backlighting
  • Picture Wizard II (Easy Picture Calibration)
  • High Definition Resolution
  • ENERGY STAR Qualified
  • ISFccc Ready

Technical Details

  • Brand Name: LG
  • Model: 32LV2500
  • Display Technology LED-lit
  • Display Size: 82 centimeters
  • Image Aspect Ratio: 16:9
  • Image Contrast Ratio: 1000000:1
  • Resolution: 720p
  • Refresh Rate: 60

You want a better, crisper,
more dazzling picture?

Well, that’s what you’ll get, along with a whole lot more, when you purchase the LV2500. LG’s LED display technology makes it beautifully slim with a picture to match, and all in stunning HD. It’s nice to get what you want.

KEY TECHNOLOGIES

  • YOU WON'T BELIEVE YOUR EYES.

    YOU WON’T BELIEVE YOUR EYES.

    Tired of dark scenes or dull colors? LG’s LED technology provides a slim profile and delivers amazing brightness, clarity and color detail, as well as greater energy efficiency compared to conventional LCD TVs.
    SEE AND EXPERIENCE MORE.

    SEE AND EXPERIENCE MORE.

    Pictures are sharper. Colors are more vibrant. Entertainment is more real. Everything looks better on an HDTV.
  • SAVE MORE THAN ENERGY.

    SAVE MORE THAN ENERGY.

    Earning the ENERGY STAR means a product meets strict energy efficiency guidelines set by the US Environmental Protection Agency and the Department of Energy. For TVs, it means they save energy both in standby and active (when they’re on) modes. ENERGY STAR–qualified TVs use about 30% less energy than standard units.

ADDITIONAL FEATURES

FIND THE PERFECT PICTURE.

Get easy self-calibration with on-screen reference points for key picture quality elements such as black level, color, tint, sharpness and backlight levels. Take the guesswork out of picture adjustments with this simple-to-use feature. It’s not actually magic, but it will sure seem that way.

VIEW IT IN THE RIGHT LIGHT.

Let your TV do the adjustments for you. Intelligent Sensor automatically optimizes the picture to the lighting and color conditions in the room for a more enjoyable viewing experience.

WISE AND NOT WASTEFUL.

With our Smart Energy Saving Features, you can conserve money and energy.


More Pictures:

http://cdn.thetechjournal.com/wp-content/uploads/images/1109/1316538862-lg-32lv2500-32inch-720p-60-hz-led-hdtv-5.jpg

http://cdn.thetechjournal.com/wp-content/uploads/images/1109/1316538862-lg-32lv2500-32inch-720p-60-hz-led-hdtv-6.jpg
http://cdn.thetechjournal.com/wp-content/uploads/images/1109/1316538862-lg-32lv2500-32inch-720p-60-hz-led-hdtv-7.jpg
http://cdn.thetechjournal.com/wp-content/uploads/images/1109/1316538862-lg-32lv2500-32inch-720p-60-hz-led-hdtv-8.jpg
http://cdn.thetechjournal.com/wp-content/uploads/images/1109/1316538862-lg-32lv2500-32inch-720p-60-hz-led-hdtv-9.jpg


Readmore...
Friday, September 9, 2011

Samsung SyncMaster S23A350H LED Based 23-Inch Monitor Review

0 comments
 
Samsung has released SyncMaster S23A350H a new LED based 23-inch monitor this year. Samsung’s S23A350H monitors will change your previous viewing experience by it's realistic image. With a 23 inch panel width, a 0.9-inch bezel and 3.3-inch distance form the bottom of the bezel to the desktop make S23A350H  differences from previous models. Samsung S23A350H has three modes(50%, 25% and Power Saving off) for energy saving. Eco saving makes saving energy easy. You can control energy saving rate by adjusting brightness of your Samsung monitor. And with the choice of three energy saving modes (50%, 25% and Power Saving off), you can really tailor your monitor use to meet your own personal needs. It is like an explosion of colors and leaves other screens seeming dull in comparison.
Samsung  SyncMaster S23A350H LED Based 23-Inch Monitor

Samsung  SyncMaster S23A350H LED Based 23-Inch Monitor

Specifications

Display

  • 23″(16:9) Screen Size
  • Display Brightness (Typical): 250 cd/㎡
  • Mega ∞ (Static 1,000:1) Dynamic Contrast Ratio(Typ.)
  • 1,920 x 1,080 Display Resolution
  • Response Time: 2ms (G2G)
  • 170°/160° Viewing Angle
  • Display Colour Support: 16.7million

Features

  • DDC 2B Plug & Play
  • Mac compatible
  • Cabinet Color: ToC (Rose Black)
  • Accessories: D-Sub Cable
  • Eco Saving, Multi Screen S / W, Samsung MagicAngle, Samsung MagicBright3, Samsung MagicColour, Off Timer, MagicTune, Customised Key, Image Size, DVI with HDCP

Stand

  • Simple Stand
  • Tilt Stand

Signal Input

  • D-Sub, HDMI Video Signal
  • Separate, Composite, SOG Sync. Signal Input
  • D-Sub, HDMI input

Dimension

  • Product Dimension (with stand): 555.7 x 426.4 x 239.2mm
  • Product Dimension (without stand): 555.7 x 346.6 x 59.2mm
  • Shipping Dimension: 678.0 x 424.0 x 130.0mm

Power

  • Power Consumption: 29Watts
  • 0.3Watt(Typ.) Stand-by Power
  • Power Type: External Adaptor

Weight

  • Product Weight: 3.1kg
  • Shipping Weight: 4.8kg


Keywords:
Samsung SyncMaster 23" Widescreen LED Monitor With 2ms
Samsung SyncMaster S23A350H Specs - LCD Monitors
SAMSUNG SyncMaster™ S23A350H Black LCD Monitor, 23"
Samsung SyncMaster S23A350H photos
SyncMaster™ SA350 Series 23" LED Monitor
Samsung S23A350H review
Samsung SyncMaster S23A350H review
New 23 inch monitor by samsung
syncmaster 23 inch of samsung
samsung syncmaster 23 inch
23 inch LCD monitor by samsung
16:9 LED LCD Monitor
S23A350H 23" 16:9 LED LCD Monitor
23" LED, HDMI, Schwarz: Specification
S23A350H's unique aesthetic features
Energy saving LCD monitor
Lcd display for energy saving.
Energy saving controller in LCD display
Samsung energy controller LCD monitor
Full HD LED Monitor
23 inch Widescreen LED Monitor
Samsung Syncmaster Widescreen Lcd Monitor
LCD display - TFT - LED backlight 

Samsung Monitor, Samsung Display, 23-inch, Wide screen, LED display,Samsung product, Samsung's 3D,
Samsung 23 inch dispaly , Samsung SyncMaster, 23 Inch LCD Monitor , 23 Inch LED Monitor ,
samsung 30 inch display
samsung 23 inch tv
samsung 23 inch led monitor
samsung 23 inch monitor review

Readmore...
Saturday, July 23, 2011

HTC Wildfire S 3G Android Smartphone for T-Mobile Review

0 comments
 
HTC Wildfire S is a new 3G smartphone Android Gingerbread (2.3) and will relesed for T-Mobile on 3rd August. Upcoming avaliablity of this new HTC Wildfire S announced by T-Mobile. This handset is powered by Android and built with very simplicity in mind. 512 MB of RAM and 512 MB of internal storage,a Qualcomm MSM7227 600MHz Processor, user friendly HTC Sense UI as well as Gorilla Glass to protect the touchscreen. By the sound of HTC it may be available on 3rd August for $79.99 after a $50 mail-in-rebate with a two-year service agreement and qualifying Classic voice and data plan (plus taxes and fees).


HTC Sense experience combined with Android 2.3 (Gingerbread) operating system. Packaged in a stylish form-factor, including a 3.2-inch capacitive touch screen display with 480x320-pixel resolution. The new low-cost smartphone also offers essential smartphone features such as a 5-megapixel autofocus camera and video recorder and a virtual QWERTY keyboard with Swype virtual keyboard for easy text input, HSDPA, Wi-Fi, GPS, Bluetooth and MicroSD card support. The HTC Wildfire S is perfect for browsing the Web, accessing turn-by-turn navigation, sending and receiving emails and keeping up with social networks.
The HTC Wildfire S will be available in a white color finish at T-Mobile retails stores nationwide and online at http://www.t-mobile.com. The HTC Wildfire S will also be available in a black color finish exclusively at Walmart, Sam’s Club and t-mobile.com.


Express yourself: The HTC Wildfire S has a sleek design and an easy-to-use 3.2" touchscreen. Put your own stamp on it by downloading widgets and colourful skins. It's easy to stay connected, too, with multi-window browsing and the ability to look up highlighted text on Google® or Wikipedia®.

Snap and share: Take great pictures on the HTC Wildfire S's 5 megapixel camera with autofocus and flash. Then, upload them to your favourite social networking sites and tag everyone to share memories with your mates.

Android 2.3: With the latest version of Android, the HTC Wildfire S gives you access to a world of over 200,000 apps. Download games and handy tools straight to your phone in seconds and share them with your friends in a few taps.

Features:

  • Display: Capacitive touchscreen with pinch-to-zoom capability, 320 x 480 pixels (3.2 inches) with auto-rotate
  • Processor: 600 MHz processor.
  • Operating System: Android 2.3 (Gingerbread) OS.
  • User Interface: HTC Sense 2.1 UI.
  • Camera: 5 megapixel camera with auto-focus and flash
  • Messaging: SMS, MMS, Email
  • Internet: GPRS, EDGE, HSPA (7.2 Mbps download, 384 kbps upload)
  • Connectivity: Bluetooth 3.0 with FTP/OPP , Wi-Fi connectivity, Internal GPS Antenna.
  • Memory: 512 MB ROM , 512MB RAM.
  • Port and Connector: G-Sensor, 3.5mm headset jack, micro-USB 2.0, microSD card slot
  • GPS receiver with digital compass, Google Maps, HTC Footprints and geo-tagging
  • Multimedia: Video recording (3GP format), Music player (aac, .amr, .ogg, .m4a, .mid, .mp3, .wav, .wma formats), FM Radio
  • Ringtones: MP3 ringtones
  • Size: 101 x 59 x 12.4 mm
  • Battery:1230 mAh battery.
  • Battery Life: Up to 430 mins talk-time and Up to 570 hours stand-by time.


Videos:

HTC Wildfire S - A Closer Look
Surf the web in style with multi-window browsing, pinch to zoom with auto text reflow, and Flash video support. The HTC Wildfire S lets you take great shots with the 5 MP camera with flash, tag your friends in the pics and instantly post them to social networks for all to enjoy. Explore thousands of apps on Android Market™ and send your favorite ones to friends - so everyone can get in on the fun.


HTC Wildfire S Review by PhoneArena
PhoneArena reviews the HTC Wildfire S. Much like the HTC Desire, the original Wildfire played a significant part in bringing HTC and Android to the masses. More affordable than its higher specced sibling, it was nevertheless endowed with HTC's trademark build quality and Sense UI. In our review, the handset got an overall thumbs up, with room for improvements, most notably with respect to the screen. Hopefully, with the HTC Wildfire S, HTC have managed to put the hot back into this Wildfire


Keywords:
3G, Android, android 2.3, Cellular Phones, Gingerbread, HTC, HTC Corp., htc sense, HTC Wildfire S, Smart phone, smart phones, smartphones, Swype, T-Mobile, T-Mobile HTC Wildfire S, T-Mobile , Virtual QWERTY Keyboard, Wildfire S

t-mobile htc wildfire

htc wildfire t mobile branding

htc wildfire cijena t mobile

unlock htc wildfire t mobile

t mobile htc wildfire deals

htc wildfire prepaid t mobile

htc wildfire t mobile branding entfernen

htc wildfire mit t mobile branding

htc wildfire for t mobile
Readmore...
Wednesday, July 20, 2011

Samsung Galaxy Pro SmartPhone Review

0 comments


Samsung Galaxy Pro is the newest smart phone with small 2.8-inch capacitive touchscreen. This is the only helpful device with a 4 tiered QWERTY  physical keyboard. Galaxy Pro has a 320 x 240-pixel resolution display. I can not guess anything that why samsung choose to make this low resolution screen in this smart technology time. A 2.8" screen is pretty small for an Android handset, How android os is manageable with landscape orientation on such this small screen? Add to that the lack of multi-touch and the Samsung Galaxy Pro display begins to lose appeal. Viewing angles are also pretty poor, as is outdoor visibility, making the display's one redeeming factor being its responsiveness. Like most galaxy S device it has 3.52mm headphone jack on up top as well as a micro USB connectior protected by a sliding cover while on the reverse of the handset is the battery cover complete with a textured finish, 3MP camera and loud speaker. To the right of the phone is a volume rocker and to the left a power button. It is at 10.7mm thin and it is 3.52mm thinner than the BlackBerry Tour and just 1mm thinner than iphone 4.  The Samsung Galaxy Pro looks rather rectangular and rigid, so while similar in form factor to BlackBerrys of late. The phone is entirely plastic, though feels sturdy. With a pleasing aesthetic and overall solid feel finished off with a good keyboard experience.

QWERTY keyboard is for professionals who want the tangible feedback of pushing buttons while typing but it also embraces the navigational and intuitive ease provided by a capacitive touch screen. GALAXY Pro comes equipped with ThinkFree Office, so you can create, open and edit work documents from your mobile - no PC required! You also have access a varied portfolio of business applications from Android Market. A quick glance lets you check all your messages at once with the integrated inbox, while the integrated contact list lets you send a message to friends or work associates. The Integrated Calendar keeps your professional contacts close at hand. Stay on top of your game no matter where you are! With Android Market access, you can download from thousands of apps available. Make your mobile do what you want it to do! GALAXY Pro comes with a secure Wi-Fi connection provided by CCX (Cisco Compatible Extension), secure access to intranet through Virtual Private Network and device management and security solutions from Sybase Afaria to ensure high protection for business data.

Technical Details

  • GSM&EDGE Band: 850/900/1800/1900. 3G Bands: 900/2100
  • Operation System: Android Froyo
  • Display: TFT TN, LQVGA (320 x 240), 2.8 in. Input Device: Qwerty Key, Virtual Keypad
  • 3MP Camera with x3 Digital Zoom, Auto Focus
  • Standard Battery: 1,350mAh Capacity: Talk time: up to 660minutes (2G), up to 380minutes (3G), standby time: up to 610hours(2G), upto 430hours(3G)


compare the Samsung Galaxy Pro with many other phones

compare the Samsung Galaxy Pro with many other phones

Samsung Galaxy Pro Video Review


Samsung B7510 Galaxy Pro Unlocked GSM Smartphone | 3 MP Camera, Android OS, Touchscreen, QWERTY keyboard, Wi-Fi, GPS and MicroSD Slot


Readmore...

Lenovo IdeaPad P1 10.1-Inch Windows 7 Tablet Review

1 comments
 
No need to waiting for Windows 8. Lenovo has brought a new windows 7 compatible tablet IdeaPad Tablet P1. 10.1-inch display with a 1280 x 800 capacitive touchpanel. 1.5 GHz Intel processor, up to 2GB DDR2 RAM, built in bluetooth 3G Wifi, microSD card slot and more. Every single Windows 7 tablet that tested has some difficulties with a similar fate:like some are bulky, some are too difficult to operate sans a keyboard and mouse. Lenovo discover that solutions from this problems with this new IdeaPad Tablet P1

Lenovo IdeaPad P1 Tablet

FEATURES:

Operating System : Genuine Windows 7 Home/Professional
Processor: Intel 1.5GHz
Memory(RAM): Up to 2GB DDR2 800MHz memory
Display: 10.1-inch HD (1280×800) capacitive touchpanel, 16:10 aspect ratio , widescreen with multi-touch display
Storage: 32GB  up to 64GB of SSD storage
Graphics : Integrated Intel HD graphics
Bluetooth: Built-in
Network: 3G / WiFi
Ports : 1 x USB2.0 port, Micro SD card reader,Mini-PCle x3, Wireless WAN SIM, docking port(optional), mic, headphone
Connectivity : 802.11bg/bgn WiFi, Ethernet LAN,Bluetooth , optional 3G connectivity (WCDMA/EVDO)
Camera: An integrated 2 megapixel webcam up front
Battery: Two cell battery  for six hours of use
Dimension:  279×14.5x184mm
Weight: about 811 gms.
Thickness: 14.5mm thick

Full support for Flash content
  • Headphone Jack
  • Wireless WAN SIM
  • Docking Port
  • Card Reader (Micro SD)
  • USB 2.0 Port (1)
  • Microphone Jack
  • Mini PCle x3


INSPIRE CREATIVITY
• Slim and eye-catching design with an aluminum rear-casing in
attractive Clementine Orange or Silver-gray color offerings
• Attractive matching carry-case1
SIMPLIFY
• Lenovo App Manager gives you quick and convenient access to
productivity and entertainment apps to easily switch between work
& play
• OneKey® Rescue System2 makes data backup & recovery simple &
easy – now you can worry less and focus on being more productive
• Microsoft Security Essentials provides an extra layer of security
• Power on and off in an instant with fast sleep & resume

GO THE DISTANCE
• Integrated Bluetooth®, 3G4 and WI-FI connectivity for internet on
the move
• Ultraportable; just 14.5mm3 thin & weighing only 810g

CAPTIVATE & ENTERTAIN
• Dual touch-screen technology; multi-touch display and
optional stylus pen1
• Full support for Flash content
• Integrated front-mounted webcam; ideal for web chats
• The latest addictive games such as AngryBirds® and Plants vs. Zombies, plus other fun and interactive apps
• Energy Management – protects the long-term durability of the battery and uses advanced energy-saving technology to increase
time spent between charges
• VeriTouch™ – a cool and fun way to login to your tablet; select a unique combination of areas on the screen to validate your identity

Lenovo ThinkPad x121e 11.6-inch Laptop Review>>


Keywords:
10.1-inch, ideapad, ideapad tablet p1, IdeapadTabletP1, lenovo, lenovo p1, LenovoP1, microsoft, p1, slate, tablet pc, TabletPc, windows 7, Windows7
Readmore...